Pages

Tuesday, March 24, 2009

I Can't Wait Mini Album


Sorry I was meant to post this last Friday! The school inspectors have decided to pay my school a visit so as you can imagine I have not had a spare minute.

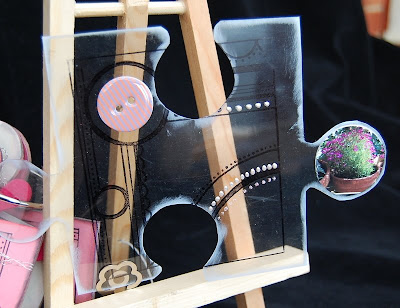
The backing for the book is an old jigsaw that belonged to my daughter. I was going to end up in the bin but I knew it would take on a different life it it ended up in my craft room.
The pages were covered with paper and the edges inked, a few stamps here and there, and acetate page and a few embellishments and it was finished.

Thursday, March 19, 2009

SNR Spring Fling Event

The Card Universe is such a fantastic way to share ideas and gain some much needed inspiration on occasions. Click on the banner to discover the Universe!
I am taking part in the Spring Fling Event. My designated day is Friday 20th March, even though it say Thursday! Not going to have a chance to do it tomorrow!
I thought I would share with you a card I have made using some hand made wire embellishments.


I threaded some wire through the centre of a button and then crocheted the wire to form the petals.

I crocheted the wire and added the buttons as I went.I simply threaded some buttons onto the wire.


On the front of this mini album I crocheted a flower and placed a hat pin through the center of it and added a few beads.

I will share this album tomorrow.

I am by no means an expert at crocheting and I have found crocheting with wire is very forgiving as you can bend it into the shape you require. I learnt to crochet from the videos I watched on You Tube.

I hope you enjoyed my contribution.

Monday, March 16, 2009

Thank You Card


The pink background is core'dinations ColorCore Cardstock, I sanded the edges to reveal to coordinating colour. The green paper in BASIC GREY two scoops, flowers are PRIMA and I added a bit of sparkle with some Cotton Candy STICKLES. The Thank You sentiment is from Heidi Swapp. Lace is from my local fabric shop.
Posted by Picasa

Sunday, March 15, 2009

Tilda with hearts card


Such a cute Tilda! She was coloued using water resistant pencils and Sansodor which is blended with a - not sure what they are called basically it is a cardboard tube which soaks up the Sansodor and the blends the pencils.
Posted by Picasa

Monday, March 9, 2009

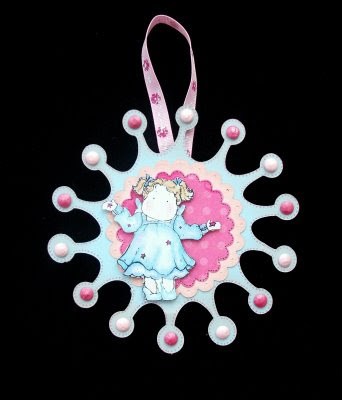
Party Tilda hanging card


I used my cricut to cut out the shape of the card<Accnt14s from the Accent Essential cartridge. Cut out some scalloped circles using nestabilities and placed Tilda on top.
Posted by Picasa

Tuesday, March 3, 2009

Celebrate Card


This is another card along the same lines of one I made the other day. The flower is from a fake flower which has been pulled apart and then I stamped and embossed it.
Posted by Picasa

Monday, March 2, 2009

My first go at a canvas


This is my first attempt at 'canvas art'. I really enjoyed creating this. I had an old canvas that I didn't particularly like, rather than throw it out I thought I would create something new with it. The idea came about when I bought some glimmer mists from my local craft shop. I was experimenting with them (the dolly and the torn bit in the top right hand corner).The colour was coffee shop. I thought the colour would go well with a sepia photo..... so that is where it all started from. The papers used were from the Basic grey Periphery range. I masked several areas with the Tim Holts masks and my home made masks using the Cricut. The lace was originally white but I dyed it with the glimmer mists. A bit of stickles and liquid pearls here and there and it was finished.
Posted by Picasa

Sunday, March 1, 2009

Sketch Saturday #40 challenge


I made this card for the sketch Saturday Challenge blog which can be found here. The stamp is a SUGAR NELLIE stamp and is called Lola with bird. The image is coloured using copic markers. The papers were free with a magazine I got ages ago.
Posted by Picasa

Saturday, February 28, 2009

Wedding card


Recipe....
1) Cut an A4 size piece of card from core’ destination card stock and fold to make an A5 card.
2) Using the Accent Essentials cartridge cut using a cricut set set size to 5". The paper I used was from K&Co Smitten range.
3) Using again the accent essentials cartridge cut varying sizes flowers
4) Cut a white strip to place in the middle of the card and ink the edges with worn lipstick distress ink. Stick onto the middle of the pattered accent and embellish with black ribbon.
5) Stick patterned accent onto the middle of the card and draw fake stitching around the outside.
6) Also draw fake stitching around the outside of the flower accents and then position and stick onto the card.
7) Ink edges of words and position and stick onto the card.
8) Cover flowers and words with crackle glaze and leave to dry over night. Add platinum liquid pearls around the outside and attach a few pink bows.
Posted by Picasa

Monday, February 23, 2009

Cards from Craft work cards


These six cards were made from the Everyday goody bag from craftwork cards. Which can be found here. They were great fun to make and I still have so much stuff left. I reckon I can make the 40 cards the kit supplied me with.
Posted by Picasa

Sunday, February 22, 2009

One becomes two


These two cards started as one. I didn't like the card when I had finished it, the proportions felt all wrong. So I cut it in half! The background paper is by Dream street papers from the Near and Dear range. The decoupage decorations are K&Co - Wild Saffron Leaves .
Posted by Picasa

Friday, February 20, 2009

Sugar Nellie- Lola with Gift


This card is for a challenge on Sketch Saturday blog it can be found here. Lola was coloured using copic markes, mounted on a scalloped circle from the Nestabilities range and fake brads put around the outside. The flowers are Prima and embellished with Stickles. The paper is scraps from my scrap draw.
Posted by Picasa

Thursday, February 19, 2009

Christmas Hat Tilda


I made this card for the Spoon Full of Sugar challenge 39 which can be found here. The main backing paper is from the Basic Grey Pheobe Range it is called Chinatown. The oval is embossed using a cuttlebug folder. The stamp is the Christmas Hat Tilda, I did not realise it was meant to be a Christmas stamp until I went to look at the name a minute ago!
Posted by Picasa