Pages

Sunday, January 31, 2010

Stampin Up folding Card


Posted by PicasaI used a 12" x 16" piece of Stampin' Up kraft card stock. It was then scored at 4" intervals and half of the end two squares were cut away. I used the jumbo wheel so swirly and covered the card-stock with it using old olive ink. The mat colours are Old Olive and Pumpkin Pie. I then threaded 40cm of ribbon through so the card could  be closed

Thursday, January 28, 2010

Stampin' Up Round Tab Punch

I have just made this video demonstrating how to get the most out of the Stampin Up round tag punch.

Tuesday, January 26, 2010

Stampin' Up Post it note holder


Posted by PicasaI saw this idea somewhere on the internet and I thought I would give it a go.

Monday, January 25, 2010

France 2007 scrapbook page


Posted by Picasa

CLICK ON THE PICTURES TO MAKE THEM BIGGER.I enjoyed making this layout. The frame is the outside of a game where the bits had to be punched out. I gave it a few licks of paint and doodled over it. I really dislike my handwriting so I chose to hide the journalling behind the frame The paper is from a Stampin' Up paper pack.

Saturday, January 16, 2010

Altered bird house


A while back I altered a bird house and it was kind of a vintage style. This time round I went for the modern girly look.
Posted by Picasa

Tuesday, January 12, 2010

Large Tag Cards


Posted by PicasaThese are large chipboard tags that I have had kicking around for over a year, I finally got round to decorating them.

Monday, January 11, 2010

Thank You Card


It has been a while!! I got a whole load of great Stampin' Up goodies for Christmas, it has given me a new lease of life. I cut out the Background (old book) using the Album Brackets from Sizzix.... Still waiting for Stampin' up to sort themselves out and bring in the top note die in the UK!!!. Inked the edges using walnut stain distress ink, painted a bit of white gesso over the whole thing and stamped the Medallion stamp (again with the walnut stain distress ink). I then stamped the sentiment using Ruby Red ink from Stampin' up ( stamp came from the Say it with scallops set) and used the square scallop to punch it out. Stuck it to a 5x5 cream card, tied a big red satin knot and it was done!!!
Posted by Picasa

Tuesday, October 6, 2009

Paper punched Robin/bird


I made these using paper punches. To see how I made them take a look at my You tube video.

Sunday, September 27, 2009

Tuesday, September 22, 2009

Digital cut files (SVG)

Hi, been a while again, there is no excuse. Well a few people know the reason!! I follow  lady called Kristina Werner, she does some great stuff and posts loads on to You tube. This is a link to her blog.... get it here. The card I have made is a pretty much a straight copy of a card she has done.


This is the back of the card. Thought I could stamp handmade in here.

Sunday, September 6, 2009

Getting ready for Christmas

Thought I would try out a Christmas card today. I need to make them simple for mass production if I am going to sell them. BUT is this too simple? The tree is thick aluminium which has been inked up with Ranger alcohol inks and then run through the crimper. The back ground is made using a stampin' up stamp ( By Definition).

Saturday, September 5, 2009

Ranger Melting Pot - the first five things I ever made

I have bought a Ranger Melting Pot. I love it, these are the first five items I have made.


These first three were made using black Ultra Thick Embossing Enamel (UTEE). I dipped a piece of cardboard into the Ranger melting pot and then allowed it to cool. The next step was to dust various areas with different colours of perfect pearls. It was the reheated with a heat gun, a stamp was inked up with Lime ColorBox Pigment Cat's Eyes ink and pressed into the UTEE before it cooled( this was for the leaf one) the other two were with gold pigment ink. The last example was reheated again so the whole thing became smooth. It is rather hard to see where the stamp was but is has a nice gold streak through it.

These two were made using clear UTEE. A piece of pattered paper was cut and dipped in to the UTEE. On the first example Ranger alcohol inks was dripped on before the UTEE cooled. Do not try and reheat the UTEE as the inks burn... this can be seen in the top left hand corner. The second example was made by pressing lace into the hot UTEE and reheating with the heat gun.
I have a long way to go, but is great fun experimenting.

Wednesday, September 2, 2009

Embellishments with Adirondack plum Color wash


The embellishments on these cards were altered using Adirondack Plum color Wash. I may get round to some instructions at some point.
Posted by Picasa

Sunday, August 30, 2009

I nearly threw up!!!

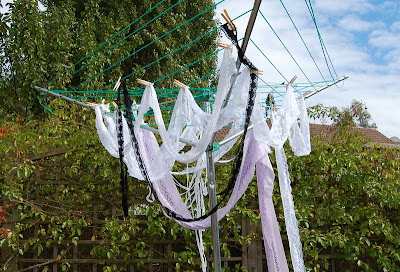
I think I am becoming addicted to car boot sales!! I am so please with the things I managed to pick up today BUT I did nearly throw up when I opened the bag of lace bits (£2). The SMELL, stale cigarette smoke with a waft of dirty dogs and old ladies knickers!!! Hence I washed it straight away see photo below.

Saturday, August 29, 2009

Altered Art Chocolate box


This started life as a chocolate box. The flower is a gathered ribbon and the tile is one I had left over from making the bird house.