Pages

Showing posts with label Sewing. Show all posts

Wednesday, September 16, 2015

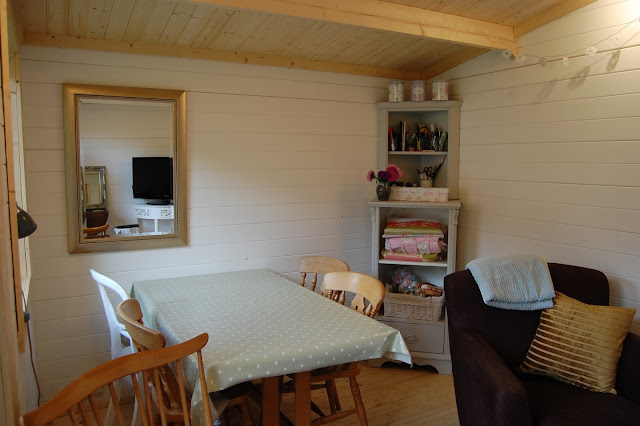
Dunster House Log Cabin.... It is finished!

We are so pleased with our Dunster house log cabin! Everything was just as they said, there were no problem parts and there were no missing parts. It went together so easily.

I love going down the garden in the evening to watch the television, sew and crochet. My husband has not been banned, some of his books down there too!

The reason this post is so late is that I have been super busy with work. Even marking has been made easier when I go down to the cabin, it is so peaceful, there are no distraction, marking is done in half the time, a slight exaggeration there!

We are also pleased that the went for the fully insulated option, yes it was slightly more expensive, but I really do feel that we will be able to use the cabin all year round! I am already planning for Christmas!




Thursday, April 17, 2014

Sew Me Something Patterns

I am away for the night in Stratford-Upon Avon. We went for a lovely stroll in the town a came across a great little fabric shop. I then realised it was selling some fantastic patterns I had seen online, here is the link to the site http://www.sewmesomething.co.uk
I could not go away emptied handed!!

Monday, April 14, 2014

Adjustoform Tailor's Dummy - Lady Valet - Small

It has been a while. I have been too busy crafting!
I thought I would share a photo of a new member to our family. I am expecting her to be well behaved and help me to create something...
This is the link if you too would like a new member to your household.
FIND HER HERE
I bought her via Amazon but this is a direct link to the shop she came from. It is a shop called Pandoras Upholstery
The direct link is http://www.pandorasupholstery.co.uk/

Tuesday, March 11, 2014

Charlotte's Web Machine Embroidery Applique

I am reading Charlotte's Web by E. B. White with one of my guided reading groups at school and it inspired me to make this.


Wednesday, March 5, 2014

A Free Motion Embroidery Teapot and cup

Today it is a teapot and cup. I did have a link for this but just checked it and the link now goes to something else. If you google tea pot colouring in it comes up.


Tuesday, March 4, 2014

Free motion Embroidery Butterfly

So after my owl yesterday which can be seen HERE I thought I would have another go. I am no good at drawing, so designing anything filled me with fear. I decided to have a look for an easy pattern to follow on the internet. I found this children's colouring page HERE. It was easy to cut out and a good design for me to continuing practicing.


Monday, March 3, 2014

My First go at Free Motion Machine Embroidery

This is my first ever go at free motion machine embroidery. This is a very new concept for me, I have only just realised that this is even possible. I bought a free motion foot for my machine and did a bit of research in to it. I made my first ever free motion machine quilt the other day. It can be seen HERE
I really enjoyed doing this and fancied having another go with the foot so I came up with this. I have a way to go, the only way I can describe it is like drawing but moving the paper instead of the pencil.


Saturday, February 15, 2014

Valentines hearts for my family

I decided to make valentines presents for my husband and children this year. I have only taken pictures of two of them because my daughter has put hers somewhere and I can't find it. I think the children would have preferred chocolate! They were not the easiest thing to make because I had to sew all the embellishments on with clear thread. Threading a needle is bad enough when you can see the thread!


Monday, January 20, 2014

Oil Cloth box tutorial


This super simple box is so useful for storing anything you wish in.


HOW TO DO IT

Cut the following from oil cloth

Two 5” by 5” squares
Four 6” by 5” rectangles
Four 7” by 5” rectangles

On the 5" by 5"  squares (the bases) draw a square in the centre that measures 4” by 4”, this will act as your sewing guide.


You will now need to sew the sides onto the square base, be sure to use the sewing guide. Each time you sew on a side flatten out.


Next you will need to sew the sides together.


Trim sides and bottom, this will help with the shaping of the box

You will need to do this for both the rectangles. The 6” by 5” box will need to be turned through, it is worth spending a bit of time ensuring this is done well and the corners are poked out, it will help with the shaping of the box.


And finally place the two parts together and you are done

Turn over the top


You may have noticed that I have sewn the top of some of my boxes, after making a few I have realised that I don't need to do this, as the oil cloth holds its shape so well. I think it looks so much neater.


Monday, December 23, 2013

Spanner holder

So, I bet you didn't think it would be this. I have to admit it was on of the hardest things I have made because the oil cloth was so difficult to work with. I am not sure how my sewing machine managed. It is for my dad, as the original roll the spanners came in had bitten the dust.


Monday, May 6, 2013

Bucket Bags

We had our own little sewing bee today. Everyone made a bucket bag. The tutorial can be found on the Craftsy website here.