Pages

Showing posts with label Stampin' Up. Show all posts

Friday, December 20, 2013

Class Presents

Hi, I have been so busy towards the end of term I have just not had time to post the pattern to my star garland, I will try to do so in the next few days. I made my class gifts for Christmas, a candy cane mouse, a crochet star to hang on the tree and a strawberry shoe lace parcel. It took a while as there are 34 of them!!


Tuesday, January 15, 2013

Twitterpated Scallop Bag


I found this fantastic pattern here I made the bag in one evening.  I Love it as it fits my work diary in and what is even better is it is coordinated!!! The only thing that is missing from the pattern is where to position the darts, but it was easy to work out where they went.

So that was my Stampin' Up! sewing project last night..... This will be my ongoing crochet project, the wool has been ordered and it arrived this morning, all 36 balls of it! The plan is to make a massive blanket. I taught my daughter this weekend how to make the small ( three round ) granny squares, so hopefully she will give me a little bit of help. I have no idea at this point how many squares will be involved, I am just going to keep going until I have used all the wool up. I have estimated it will probably take me all year.


Tuesday, October 16, 2012

Stampin' Up! Googly Ghouls

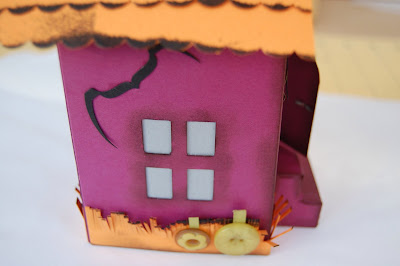
My sister had a go at making the haunted house I made last year and used the Googly Ghouls stamp set. I love the way Frankenstein is popping his head round the door.


Friday, October 12, 2012

Stampin, Up Candy Wrapper Die

My sister and I made these today in preparation for Halloween. Each wreath took 18 Candy Cane Wrapper boxes. We used the Howwstooth & Scaringbone Designer Series Paper to make the rosettes. The stamp sets that were used were Toxic Treats and Googly Ghouls.


Tuesday, October 2, 2012

Candlelight Christmas Designer Fabric

I love the  Christmas fabric from the Autumn and Winter Catalogue. I used the Candlelight Christmas Designer Fabric (page 4) to make this heart garland for Christmas. Having had the new extension last year the ceiling is really high so I was able to get carried away creating these hearts. I crotched small flowers for the centre and placed a Neutrals Designer Button in the centre of some of them.


Wednesday, April 4, 2012

Lego Stampin' Up! Card

I made this Card last week. The Yoda punch art was taken from this talented lady. It can be found here. I wanted to take it one step further so I added a  Treat cup from Stampin' Up! and Lego figure. My son was not that pleased I had used one of his Lego men to make the card hence the finger marks on the card.


Tuesday, March 20, 2012

Phone Case

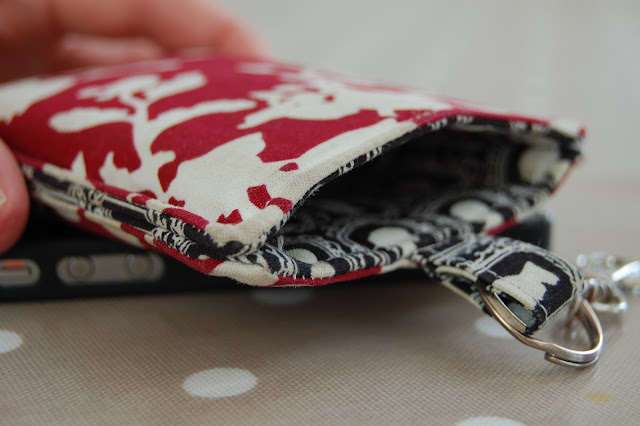
I made this case for my phone a while back using the Timeless Portrait Stampin' Up! fabric. I followed an easy to follow tutorial which can be found here. It is designed for the iPhone 4,I did find that I had to change the measurements to fit because I wanted to keep the case on my phone. It is lasting really well as I made this case around four months ago. I think I am going to have a go at another one in the Stampin' Up! Spice Cake fabric.


Monday, March 5, 2012

Mini Milk Carton Magic

My daughter did her Cub cooking badge at the weekend, we went on step further and made table favours.

Tuesday, January 31, 2012

Scallop Square Die from Stampin' Up!

I made this rag quilt a while ago and I thought I would share it with you. I can't say it was quick to make because it would be a rather big fib. However, the process was made easier because I cut out all the fabric using the  Scallop Square Die from Stampin' Up!. I was able to cut out five square at a time. The fabric I used was perfect for fraying at the edges to give the rag effect but... it took three washes and several hours in the tumble dryer to get rid of the bits, the house was covered for weeks!


Tuesday, January 10, 2012

Mini Flower Tutorial

I have been designing a scrapbook page that I will be making for a class and I came up with these cute little flowers as an embellishment. I thought I would share with you how I made them.

Using the dotted scallop ribbon border punch out a strip
Ink up edges if you wish
Screw up and manipulate the card stock to break up the fibres.


Carefully tease apart the card stock so you will end up with two strips

Roll up one of the strips and stick the end

Squash the rolled up card stock
Add a jewel to the centre


Saturday, October 29, 2011

You May Remember


A year ago I showed you how to make a paper bat using the round tab punch. I never posted what the bats went on so I though seen as it was that time of year again I would show you what I made. Have a happy Halloween!